
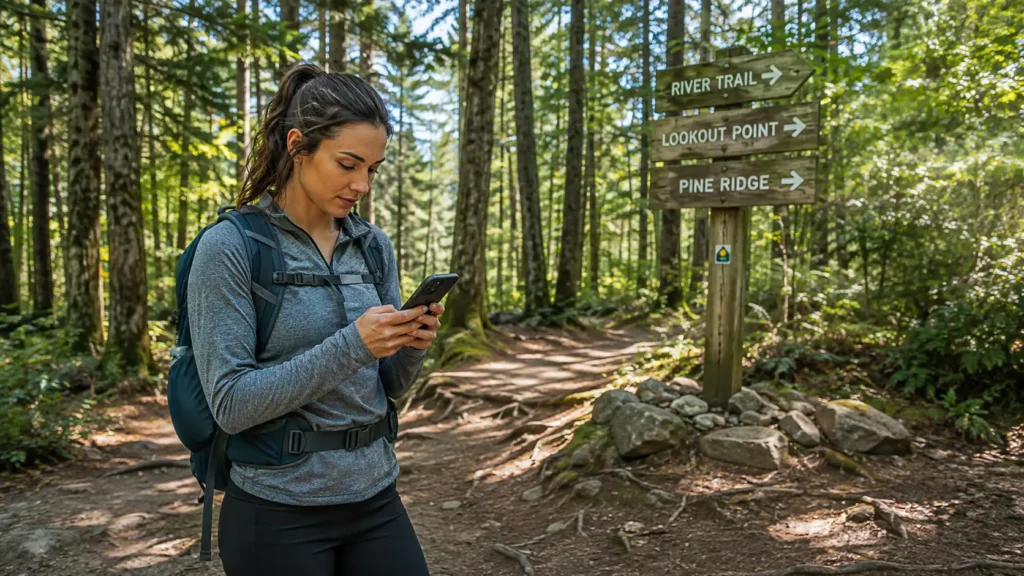
The fear of getting lost is one of the most common reasons beginner women hesitate to hike alone — or hike at all. I know because I felt it on my first solo hike, a supposedly straightforward loop trail that split in three directions at one junction with no signage. I stood there for five minutes trying to remember which way the map had shown before picking the middle path and hoping for the best.
I was lucky. The middle path was right. But I spent the next hour with a knot in my stomach, watching for every trail marker and checking my phone every ten minutes. That experience taught me something important: the fear of getting lost is often worse than actually getting lost — because most beginner hikers don’t know that getting disoriented on a trail is usually a manageable situation with a clear set of steps that resolve it.
This guide covers exactly what to do if you get lost hiking — from the first moment of uncertainty to getting safely back to the car. It also covers how to prevent it in the first place, because the best lost-hiking story is the one that never happens.
First: understand that getting lost is rarely a crisis
Before the step-by-step, a reframe that matters. On established day hiking trails in accessible areas, getting lost is almost always a recoverable situation — not a survival emergency. The vast majority of people who get disoriented on a trail find their way within hours, usually without outside help.
The situations that become genuinely dangerous are the ones where the hiker panics, keeps moving in the wrong direction, and gets further from where they started. The situations that resolve quickly are the ones where the hiker stops, thinks, and works through the problem methodically.
The single most important thing you can do when you realise you’re lost is also the simplest: stop walking. Every step you take in an uncertain direction is a step that may need to be retraced or that takes you further from safety. Stop first. Everything else comes after.
What to do the moment you realise you’re lost
Step 1: Stop and stay calm
The moment you realise you’re unsure of where you are — stop. Sit down if it helps. Take three slow breaths. This isn’t a drill and it isn’t overdramatic — panic is the thing that turns a manageable situation into a dangerous one, and the first step to thinking clearly is breaking the physical stress response.
Tell yourself out loud if it helps: I am stopped. I am safe right now. I am going to figure this out. This sounds simple but it genuinely works to interrupt the spiral of what-ifs that panic produces.
Step 2: Check your phone
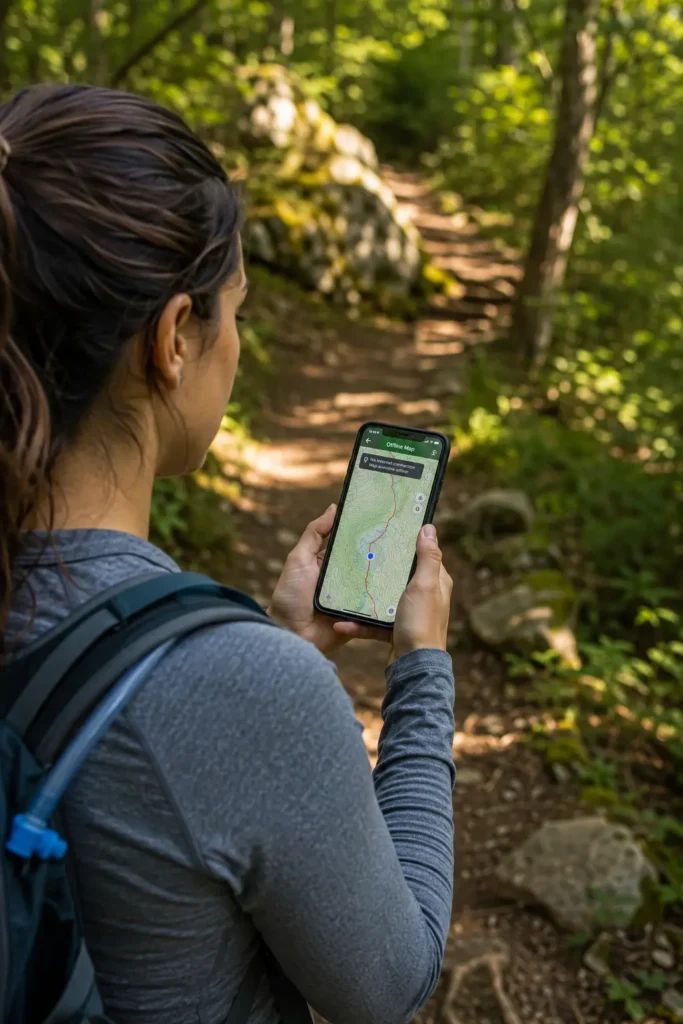
Before anything else, check your phone signal. If you have any signal at all — even one bar — use it immediately. Call or text someone to tell them your situation and your last known location. Save your battery by putting the phone in low-power mode after this call.
If you have AllTrails or another hiking app with offline maps downloaded, open it now. Your GPS location will show on the map even without signal. This is one of the most valuable things you can do before a hike — download the trail map for offline use. If you did, your phone will show you exactly where you are on the trail.
If you have no signal and no offline map, note your battery percentage. You may need to use the flashlight later, so conserve what you have.
Step 3: Look around and identify landmarks
Without moving from your spot, look around carefully. Note everything visible: mountain peaks, ridgelines, valleys, streams, buildings, roads, power lines, the direction of the sun. Any of these can help you orient yourself on a paper map or from memory.
Think back to your last confirmed landmark — the last trail sign, junction, stream crossing or viewpoint you were certain about. How long ago was it? How far could you have walked since then? This gives you a rough radius of where you might be.
Step 4: Retrace your steps to the last known point
If you can identify where you went wrong — a junction you may have taken incorrectly, a point where the trail became unclear — retrace your steps back to that point rather than continuing forward. This is almost always the right call for a beginner hiker.
Going back to a known point feels slow and frustrating but it’s dramatically safer than continuing in an uncertain direction and compounding the problem. Backtracking to your last certain location resets the situation and gives you a clear foundation to work from.
Step 5: Look for catching features

A catching feature is a geographical element that you know exists on one side of your position — a road, river, ridgeline, lake or fence line. If you walk in that direction, you’ll eventually hit it regardless of exactly where you are, and it will tell you which way to go from there.
Before every hike, identifying your catching features takes two minutes on the map and can save hours of confusion if you get turned around. If you did this preparation, now is when it pays off. If you didn’t, study any map you have (paper or digital) for large features you might be able to reach.
If you genuinely can’t reorient — what to do next
Stay where you are
If you’ve tried retracing your steps and checking landmarks and you still don’t know where you are — stop moving. This is the hardest instruction to follow because every instinct says keep trying, keep walking, figure it out. But continuing to move in an unknown direction makes you harder to find and burns energy you may need.
Find the most visible spot near you — a clearing, a high point, an open area rather than dense trees. If there’s a stream nearby, follow it downhill — streams lead to lower ground and eventually to trails or roads — but only if you can do so safely without scrambling or crossing difficult terrain.
Make yourself visible and audible
If you believe someone may be looking for you or nearby, make yourself easy to find. Use a bright-coloured item of clothing as a signal. Blow a whistle in three short blasts — the universal distress signal — and repeat at regular intervals. Three blasts of any kind (whistle, shouts, claps) means distress in most hiking contexts.
If you have a mirror or anything reflective, you can use it to signal to aircraft or people at a distance by catching sunlight. If it’s getting dark, use your phone torch to signal rather than saving all the battery — being found is more important than battery conservation at this point.
When to call emergency services
Call emergency services — 112 in Europe, 999 in the UK, 911 in the US — when any of the following apply:
- You are injured and cannot walk
- It is getting dark and you have no shelter or means to stay warm overnight
- You have been unable to reorient for more than two hours
- Someone in your group is showing signs of a medical emergency
- You are in rapidly deteriorating weather with no shelter
When you call, tell them: your name, the trail you were on, your last known landmark, a description of your surroundings, and any injuries. If you have GPS coordinates from your phone — even approximate — give them those first. Emergency services can often triangulate your position from a phone call even without GPS coordinates.
How to prevent getting lost in the first place
Most trail disorientation is preventable. These habits, done consistently, make getting genuinely lost almost impossible on established hiking trails.
Download the offline map before you leave
This is the single most impactful thing you can do. AllTrails, Gaia GPS and OS Maps (for UK hikers) all allow offline map downloads. With an offline map, your phone shows your exact position on the trail even with zero signal. Do this every single time, not just when you think you might need it — signal disappears exactly when you don’t expect it to.
Tell someone your plans
Before every hike, tell someone: the trail name and location, when you expect to be back, and what to do if you haven’t checked in by a specific time. For more essential solo hiking safety habits, the guide to solo hiking safety for women covers everything a beginner woman needs to know. This one step means someone will look for you if you don’t return — which is the safety net that makes everything else more manageable. It takes two minutes and most beginner hikers skip it entirely.
Check for trail markers every 10–15 minutes
Active navigation means regularly confirming you’re still on the right path — not walking for an hour and then wondering if you’re still on the trail. Look for blazes on trees, cairns, trail signs, worn paths and footprints. If you haven’t seen a marker in 15 minutes and the path feels uncertain, that’s your cue to pause and check — not to keep walking and hope.
Know your turning-around time
Decide before you start the hike: what time do I turn around, regardless of how far I’ve gone? The halfway point in time — not distance — is when you turn back. A trail that takes 3 hours in good conditions needs a turnaround at 1.5 hours, not at the halfway distance marker. Running out of daylight is how manageable situations become serious ones.
Carry a paper map as backup
A downloaded offline map covers most scenarios, but phones die and screens crack. A paper map of the area costs almost nothing and doesn’t need battery. For any hike in remote terrain or areas with complex trail networks, carrying a paper map alongside your digital tools is the responsible call.
What to pack in case you do get lost
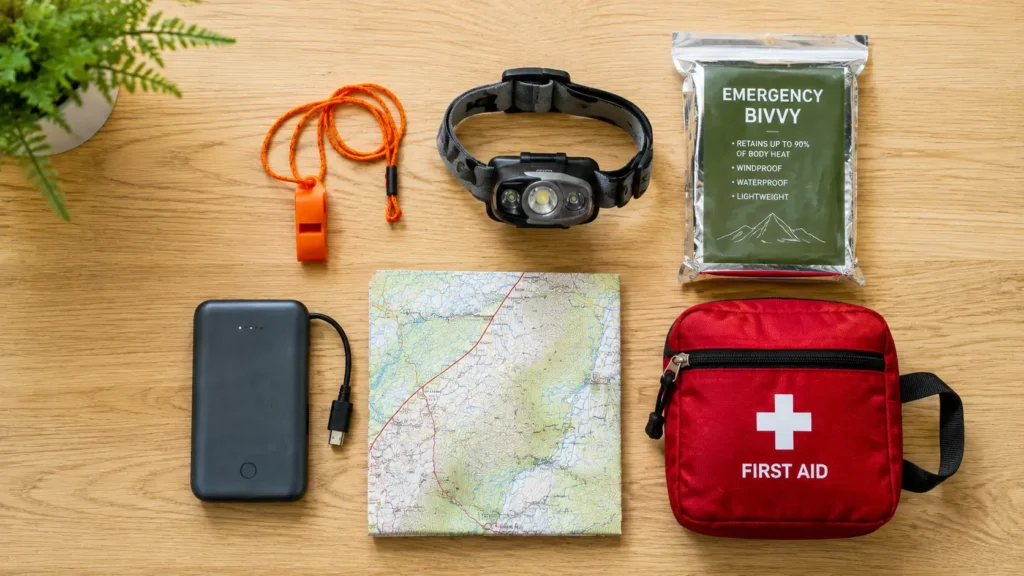
Being prepared means the situation stays manageable even if it extends beyond what you planned:
- A fully charged phone with the trail map downloaded offline
- A portable phone charger — even a small one adds hours of battery
- A whistle — the three-blast distress signal carries much further than a voice
- A headtorch and spare batteries — if you’re out after dark you need light
- An emergency bivvy or foil blanket — lightweight and takes up almost no space, keeps you warm overnight if needed
- Extra food and water beyond what you think you’ll need
- A paper map and compass as backup navigation. For a full beginner’s guide to reading trail maps and using a compass, see how to read a trail map and use a compass.
- A basic first aid kit
The mindset that keeps you safe

The hikers who get into trouble are almost always the ones who kept going when something felt wrong — who pushed past the uncertainty instead of stopping to assess. The hikers who come home safely are the ones who trusted their discomfort, stopped when unsure, and worked the problem methodically.
Getting lost on a trail is not a personal failure and it’s not a sign that you shouldn’t be hiking. It’s a situation that happens to experienced hikers as well as beginners — the difference is having a clear plan for what to do when it happens. Now you have one. For more on the mistakes beginner women make on trail and how to avoid them, see the guide to beginner hiking mistakes.
Hike with confidence, prepare well, and know that the skills to stay found are mostly habits rather than expertise. Build the habits and you’ll be fine.
FAQs
Stop walking — this is the most important first step. Every step you take in an uncertain direction makes the situation harder to resolve. Once you’ve stopped, check your phone for GPS or signal, look around for familiar landmarks, think back to your last certain location, and begin working through the situation methodically rather than reactively. Panic and continued movement are the two things that turn a manageable situation into a dangerous one.
First, check whether you have an offline map downloaded — if you do, your GPS position will show even without signal. If not, retrace your steps to your last known point rather than continuing forward. Look for catching features — roads, rivers, ridgelines — that you know exist on one side of your position and walk toward them. If you have a paper map and compass, orient the map to your surroundings and identify where you might be relative to major landmarks. If none of this works and it’s getting late, stay where you are and make yourself visible and audible.
Call emergency services when you are injured and cannot walk, when it’s getting dark without shelter or means to stay warm, when you’ve been disoriented for more than two hours without progress, or when conditions are deteriorating rapidly. In the UK call 999, in Europe 112, in the US 911. Give them your name, the trail you were on, your last known landmark, a description of your surroundings, and any GPS coordinates your phone can provide. Don’t wait until the situation feels truly desperate — earlier calls give search and rescue more options.
Download the trail map offline before you leave — this alone prevents most trail disorientation because your phone shows your exact position even without signal. Tell someone your plans and expected return time. Check for trail markers every 10–15 minutes rather than walking on autopilot. Decide your turnaround time before you start and stick to it. Carry a paper map as backup. These habits done consistently make getting genuinely lost on an established trail almost impossible.
Yes — with the right preparation. Download offline maps, tell someone your plans and expected return time, stick to well-marked trails appropriate to your experience level, and carry a whistle and a small emergency kit. The fear of getting lost is often the biggest barrier to solo hiking for women, but the vast majority of trail disorientation on established trails resolves safely within hours. Preparation dramatically reduces both the likelihood of getting lost and the seriousness of the situation if it does happen.

Intermediate hiker sharing real trail experience — honest gear picks, beginner-friendly guides, no filler.